Disclaimer: GeekAssured is a financial software advisor and web consultants. Services such as Accounting, Bookkeeping, Payroll, Tax Filing, web consultancy and other related services offered by GeekAssured are independent of any brand or service. We other brands logos or banners that are used on this website are the registered logos, trademarks and brand names of respective companies and are used here solely for the purpose of representation. Other party’s logos and marks are the property of their respective owners and used for reference purpose only.

06 Nov

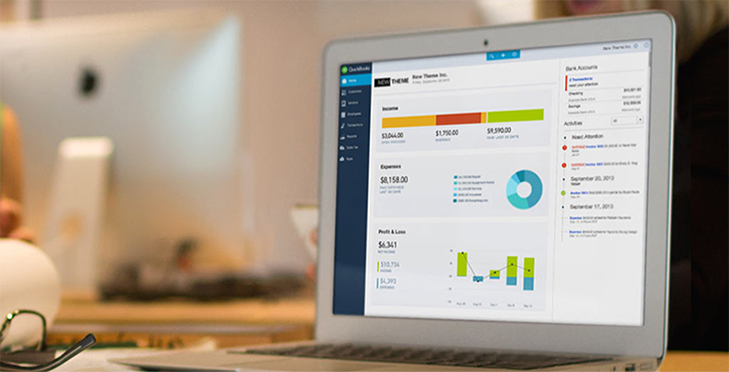
Sort Your Income And Expenses With QuickBooks®

Posted by admin
Comments 0

Accounting can be very time consuming. But, help is around the corner. Thanks to Quick Books, who have made accounting a piece of cake! So, what is QuickBooks®? QuickBooks® by Intuit® is a blessing for accountants and self-employed professionals as it helps them to manage their figures with the help of this amazing software.

QuickBooks® is the complete solution for all your accounting queries. Get complete hold of your accounts in a jiffy. Business owners can get useful information like cash flow, or complete break up of accounts like profit and loss or balance sheet in one click. Which was once considered an uphill task has become very convenient and the smartest way to get to the root of the problem.

A Quick-Fix

A business in an entire year sees various types of income and expenditure. Sometimes the nature of expenses has to be placed according to their category, which can help the owner determine the profit and loss of his business. It has been often seen that in online Quick book, it cannot judge the nature of the expenses and income and places it in undefined category. Hence it becomes necessary to create the correct category related to the business.

You can also make your payroll transactions easy, we have already discussed it with you lately.

Understanding Online Version of Quick Book

The online version of QuickBooks® is very easy to understand and work. You can categorize your income and expenses according to the nature of the transaction. When you download your bank statement into the Quick Book Software, the income and expenses fall in to their category. It is important to categorize them in order to avoid confusion. Let us see step by step as to how this process is done:

  • While running a quick report, go to transaction page by clicking the navigation bar on the left.
  • You can see list of accounts. Select the account, of a client or company.
  • You can scroll down on the navigation bar till you get uncategorized Income and expenses options.
  • Now divide your income and expenses according to the category of the transactions.

In case, any entry is wrongly entered, then editing is also possible online. You can correct it by going on the left navigation bar – transaction – expenses or income (which ever applicable) and lastly assign a proper category.

You can link your bank account with QuickBooks® Online. Look over for the details of transaction by assigning a vendor or clients name, and correct any uncategorized account to the name.

QuickBooks® is an innovative tool and software for all your accounting needs. For your convenience, Quickbooks® comes with its own mobile app, and online support which gives you the exact picture of your accounts when you are away from your computer.

  • SHARE TIHS
06 Nov

Connecting Bank Account with Quickbooks® Pro

Posted by admin
Comments 0

Intuit® has created quite a buzz by introducing QuickBooks® software for accountants and Business Owners all over the world. Everything is within one’s reach. For example- tracking your accounts without going through the hassle of opening any files or books, or generating lengthy payroll for all the employees.

Banking online

These days everyone does banking online. No one wants to wait in long queues in banks for just one transaction. In fact banks also encourage online banking, to facilitate easy access to their customers. A growing business needs at least 2-3 bank accounts. Managing these bank accounts on a day to day basis can be quite a pain. With QuickBooks® Software, you can easily manage your bank accounts in just jiffy.

As we discussed in our last post, you can also make sure that you follow all the tips and tricks for better browsing experience. With QuickBooks®, you can connect bank account and do your banking with accounting anywhere and anytime.

How can you connect your bank account?

You can link your bank accounts with QuickBooks® in these easy steps:

  • On the home page of QuickBooks®, you have to click connect an account under Bank Account navigation.
  • Select your bank. Enter your user name and password, which will help you to access your account.
  • Once the details are entered, try logging in your bank.
  • You will get all the details of the accounts you have in your bank. Select the account, which is used for your business purpose.
  • After selection, enter your account details in QuickBooks® software. It will download all transactions from last 90 days.
  • On your bank page, click on category or match option, to categorize your transaction.It will be noticed that QuickBooks® has placed some transactions under categories. Whereas some expenses or income, which were undefined, were seen as uncategorized.
  • Click on the transaction, by opening transaction menu and choose the right category.
  • Now you will have to select a payee, meaning the clients name or a business from whom this transaction took place.
  • You can enter their name and save it after entering the details.
  • If you want to transfer the amount to any other account, then go to transaction and choose the Transfer option.
  • Then comes, the split option. In this category, if you are paying to different categories of expenses, then click split.
  • Lastly, to make things easy, if all the transactions are correctly categorized, then click all the check boxes by pressing shift key and arrow key thereby selecting all transactions and clicking the batch option and accept selected.

Now your bank account is all set and connected with QuickBooks®.

  • SHARE TIHS
06 Nov

What To Do when Your Quickbooks® file is HUGE!?

Posted by admin
Comments 0

If your QuickBooks® file is huge, there are high chances that your computer may start slowing down. Let me explain what exactly is considered a big file. Files over 300 MB can begin to also down your computer. When you start feeling the slowness of the computer you can check out few tips we provide and plan to begin a new data file

Another query you would at this point is, by making a change to my data will I lose that data forever?

The answer is No. Just like any other excel file or word file you can copy, paste and rename your data file letting you access the file anytime you want to retrieve that information. All the new data should be entered in the new file. If all this information is making you dizzy. Worry not! Just give us call on our toll free number and we shall assist you within the next half an hour.

So here are few things you can consider doing to solve this problem:

  1. Upgrade to QuickBooks® Enterprise. Yes, purchase a new powerful server just to run the QuickBooks® and use terminal services. When you access QuickBooks® through terminal services the data and software is red riding on the same computer and provides a quicker reaction time as the data doesn’t go through the network. We have plenty of companies running the same file until it reaches close to 2 Gigs. For more information and update on QuickBooks® enterprise call our toll free number and get assisted.
  1. Another option you have is to condense or archive which means clean-up the data file. It will reduce the file size by around 20%. This can be a temporary alternative when you want to start a new data file. This will replace your detailed transactions with monthly journal entries for the period you are condensing.

One thing you need to is to back up your data safely. The good idea is to copy the file so that you can get back to the relevant file if you need it. From the 2012 edition this feature has improved greatly. If you need any sort of assistance with the procedure do not hesitate to call our helpline number.

  1. In some cases the file after condensing also may not be small enough. So in that case you can start a new data file by copying the current file and copying simultaneously the transactions you wish to keep and rest only the opening balances. This is ideal if you starting a new file in a new year. This can get time consuming if you lots of accounts receivable and payable. Worry not! Call our helpline and we will guide you through the procedure without any hassle.
  1. Also you can request QuickBooks® large file conversion service number to start a new file anytime during the year or even at year end. Over a weekend we will take your existing file eliminate all transactions and import balances from last year and all transactions from this year and import them into the new file. Companies which use QuickBooks® payroll service will need to add year-to-date history. We provide this service also to our clients for an additional fee.
  1. Another option you have is to request our New Start QuickBooks® File, when your list items like customers, vendors etc have become unmanageable and all you want to is a new start or in some cases when your file start a to show signs of corrupt database like crashing, failing to backup etc. We will provide you a brand new QuickBooks® file importing only your active customers, vendors, employees and accounts along with your accounts beginning balances and transactions from the first year.

So next time you feel your computer is slowing down due to the huge QuickBooks® file you know what to do. Or just give us a call on our helpline number and we will be happy to assist you.

  • SHARE TIHS
1-833-378-1224